
My own mandala
Most computers are not very artistic. Still, you can make beautiful drawings with the help of the computer. In this exercise we will work with the pen function in Scratch. Step by step we create our own mandala.
You learn to:
- work with the pen
- use coding in an artistic way
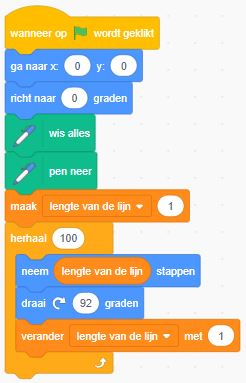
STEP 1. All beginnings
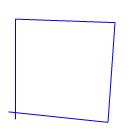
Open the online editor and delete the cat. Press "draw new sprite". You don't have to draw anything and immediately switch from the "costumes" tab to the "scripts" tab. We start simple and draw a square.
Create following code:
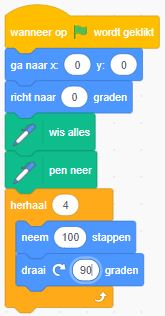
You interpret this code as follows: The code starts when the green flag is clicked. The drawing will appear in the center of the playing field. Our first line will go straight up. Any previous drawings will be deleted, only then will it be drawn. A line of "100 steps" long is drawn 4 times. The lines are rotated 90 ° each time and thus change direction. That way you get a square.
Do you understand? Try it out now! You have a nice square there :-)
STEP 2. Square variant
When we change the angle of rotation just a little bit, what happens? Instead of 90 degrees, we turn 92 degrees at every angle. Change this in your code. Normally your figure now looks like this:
A misshapen square is not our goal... But if you keep drawing, you will get a nice pattern. All you have to change is the number 4 in the repeat block. Feel free to make it 100! Press the green flag and let yourself be surprised.

Can you now make a nice pattern with a circle?
Example:

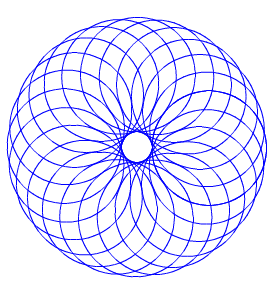
Feel free to experiment with the number in the repeat block. You get completely different results.
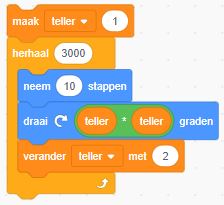
STEP 3. Variables
Until now, each line segment had the same length. By varying the length, we can turn our misshapen square into a kind of spiral. We start with a small square, and then make it a little bit bigger. We do need a variable for this. Add one and call it, for example, "length of the line".
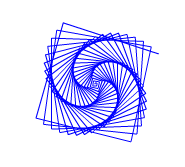
The beginning of the code remains the same throughout the exercise (up to "pen down"). From then on we use our variable. The line is very short at first and is made longer and longer. Your code now looks like this:
Here too you can achieve a completely different figure with a tiny change. You just need to change the number of the rotation angle.

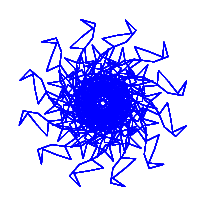
You can make a star with a rotation angle of 160 °.

STEP 4. Expand the code
The more complicated your program, the more complex your drawing. We are expanding our code. We will continue to use a variable, but we will use a "counter". In the first line drawn, the variable is 1; on the second line he is 2, and so on. The counter keeps track of the number of lines we are on. Create the variable "counter" yourself and adjust your code:
 with the result:
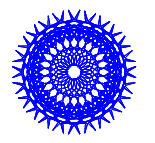
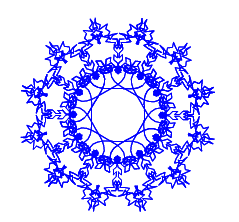
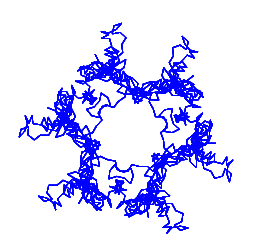
By multiplying the number by itself, we already get a more difficult drawing.
More line segments are now required to complete the drawing. So we will have to increase the number in the repeat block. In the example we repeat no less than 3000 times.
You can adjust the drawing by changing the number of steps (eg from value 10 to 8).
You can also adjust the initial value of the counter (eg "make counter 2").
With your own creativity you achieve great results such as:

You can find inspiration in the Scratch studio https://scratch.mit.edu/studios/3693249/. You will find hundreds of projects that have been designed in a similar way. The possibilities are endless!
Make your own mandala now. You can print it out and put it in your desk. When you finish faster in class, you can color the mandala. The teacher may also have a nice idea to continue working with the mandalas.
 Well done!