
Cheese and mouse maze
The mouse is very hungry and wants to eat the cheese as quickly as possible. We are making a game where you have to guide the mouse through a maze to get to the cheese. If that works, we can make the game even more difficult (cats in sight!).
You may use other scripts (eg a knight and a princess), but you must be sure to follow all programming steps as prescribed.
You learn to:
- upload your own sprite (searched via eg Google)
- control by using the arrow keys
Register before you start the exercise. Click the button below and sign up.
ORIENTATION
Take a look at the example and consider the following questions:
- What should I do?
- What are the goals?
- What are the expectations?
- What can I already do?
- What do I still have to discover?
Try to bring the mouse to the block of cheese. This can be done using the arrow keys. The cats must not get to you and you must not touch the black lines of the maze.
PREPARATION
View the steps at 'perform'. Then answer the following questions:
- Which steps should I follow?
- Which steps can I follow?
- How much time do I need?
- What tools do I need?
PERFORM
Do the steps one by one. Do you not remember how to do it? View the hints or download the solution.
STEP 1
You already know it: open the online Scratch editor and delete the cat sprite.
Choose a suitable backdrop ("playing field"). Preferably use a neutral backdrop. We do not choose a backdrop from the library this time, but go to Google. Save your chosen photo locally on your computer, for example on the desktop. Then you choose "upload backdrop".
STEP 2
Also add two new sprites (eg mouse and cheese cube) and place them in two opposite corners. Adjust the size.
If you cannot find a suitable drawing in the library, you can upload a photo yourself. Search via Google and save your chosen photo. To upload a sprite, use the following icon:

STEP 3
Draw the maze. You can choose the color yourself. You already learned how to draw a drawing on a playing field in one of the previous exercises. Do you still remember? You can also adjust the thickness of the lines. Use straight lines.
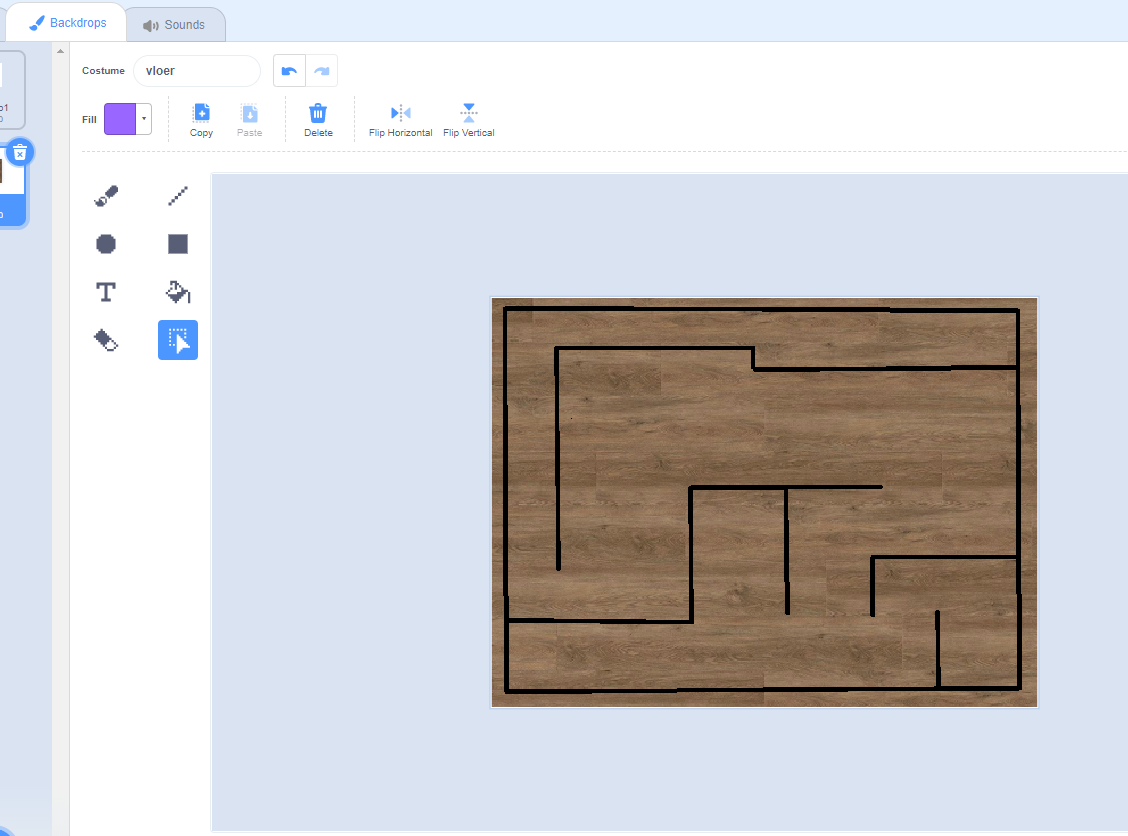

To draw horizontal or vertical lines, hold down the Shift key while drawing the lines (the up arrow).
STEP 4
STEP 5
STEP 6
STEP 7
REFLECT
Look back at the project you just made. Ask yourself the following questions:
- Does the program work as I expected? Why / why not?
- What works well?
- What works less well?
- How can I approach it differently?
Download
Click on the link below to download a sample solution.
Upload the project in Scratch. Click the button below and follow the steps.